Now you’ve got your categories, you’ll want to start filling it with your awesome products. To do this navigate to Products > Catalog.
There you will see the Add Product button. Click on this to create your first product.
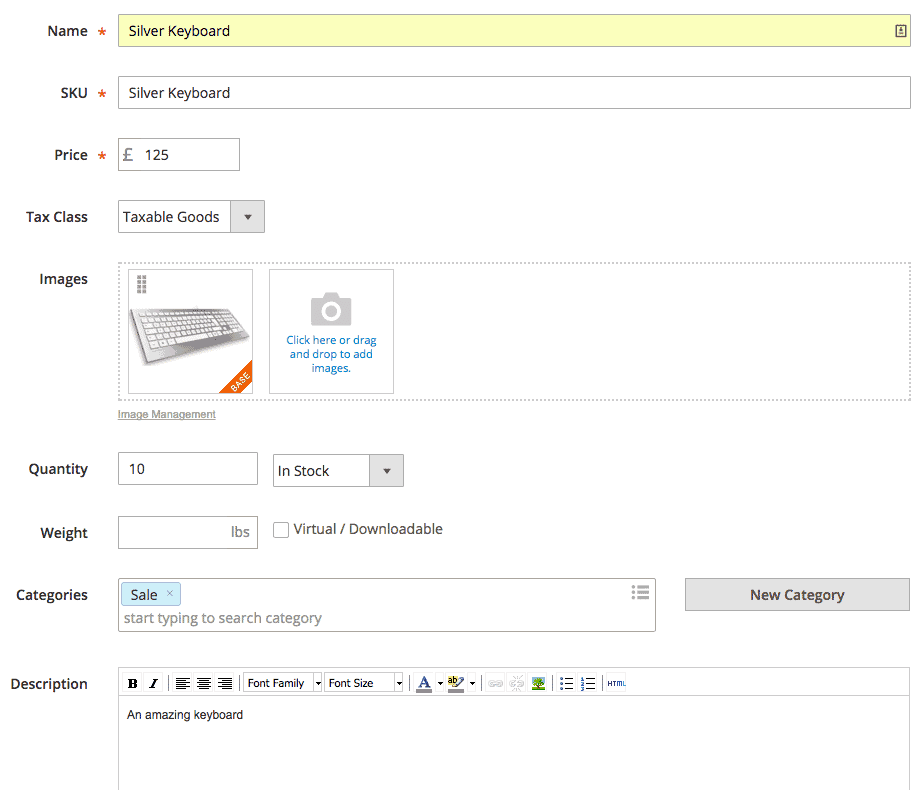
On this page you will see the general information needed for the product. Below you can see the information for a silver keyboard that we are creating.
The only required fields for this section are Name, SKU, and Price. We have put this product straight into the ‘Sale’ category, but you can easily add the product into more categories by typing in the category name. Alternatively you can create new categories on the fly by clicking New Category.
And that is all you need to create a new product! Be sure to hit the Save button to complete the set-up.
All this info can be edited at any time – just locate the product in the Catalog screen and click it to open up the product info.
Above we showed you how to create a simple product. You can set up a few different types of product, which can be done by clicking on the arrow next to the Add Product button and then selecting one of the below options:
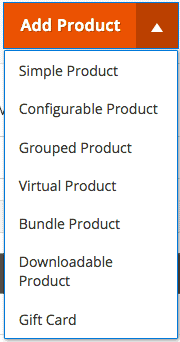
- Simple – A product with no variables and only one choice to buy e.g The Lion King DVD.
- Configurable – A product that has different choices, sizes, colours, materials, or specs etc. For example, a T-shirt that comes in Red, Blue and Green and can be size S, M, L or XL.
- Grouped – A group of products which can be a selection of the above types. They will appear as separate products in the customer’s basket.
- Virtual – When the customer won’t be sent anything but is given, for example, “credits” to use on your site.
- Bundle – This is a product where you can add other products to it, for example adding RAM, then a hard drive to a laptop.
- Downloadable – A product that, once purchased, can be downloaded, like a document or PC game.
- Gift card – A gift card that can be used for your products.
- These options should allow you to set up any type of product you want to sell.
1. Content pages
Adding and managing your amazing content via a content page is very easy; simply navigate to Content > Pages. Here you can create a new page with any content you like.
Click Add New Page to get started.
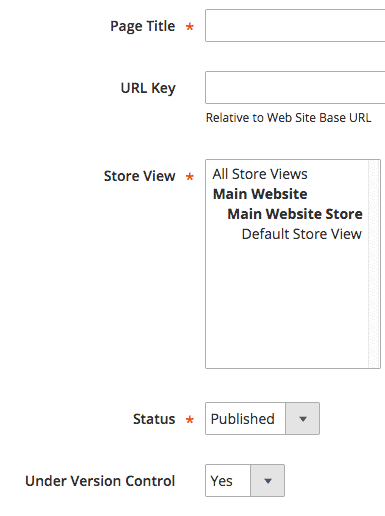
Then select Published from the drop-down menu, and that is the admin complete for your new content page.To add the content, use the left hand table to navigate to content and here you can add your brilliant content.Don’t forget to hit the Save Page button.
2. Promotional rules
With Magento 2’s promotion features you can reward your customers with money off their orders. There are 2 ways you can do this:
- Catalog Price Rules – allows you to set a discount rule across a whole category
- Cart Price Rules – allows you to set a discount on the basket level, regardless of products
The main difference here is that Catalog Rules are enacted on products before they are added to the cart, while Cart Price Rules are applied in the shopping cart.
To add a new rule navigate to Marketing > Promotions where you will see the 2 options mentioned above.
3. Catalog price rules
Click the Catalog Price Rule option to begin. Then, click the Add New Rule button to get started.
As usual, all fields with a *red asterix* need to be filled in.
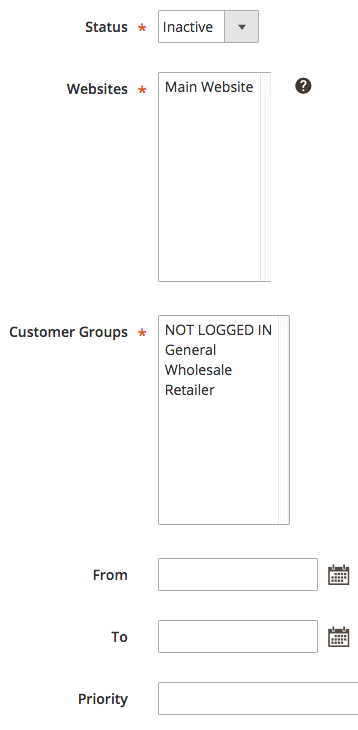
On the Rule Information tab, give your promo rule a name. This is for internal purpose only and the customer will not see it. Set Status to Active to turn the promotion on.
You can choose which of your sites this promotion will work on. In this example we only have 1 site so that has been selected. If you want to limit your promotion to certain Customer Groups you can also do that here.
Put a From and To rule to set a valid date range for this promotion. If left blank it will run indefinitely until set as Inactive. You can set the priority of this rule in relation to other rules.
Now you need to decide what conditions need to be met for the discount to be applied.
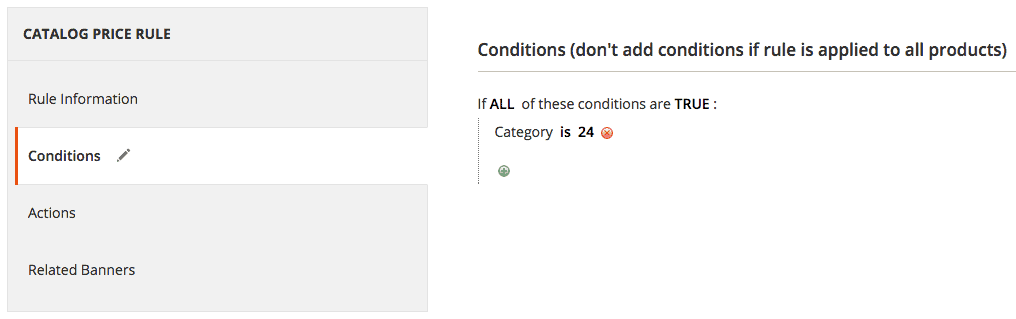
For this example we have chosen to give 10% off the Women’s category (Category ID 24). To apply the 10% discount, navigate to the Actions tab and, from the drop down, select Apply as percentage of original price and enter 10 as the discount amount. If you want to discount all products in subcategories of a top level category then select Yes for Sub product discounts.
Finally, if you don’t want any other promos to be added if someone is using this discount, then set Disregard subsequent rules to yes.
Hit Save and apply.
4. Cart price rules
Cart Price Rules are promotions you can apply to a customer’s basket regardless of the products they buy and you can also introduce a promotional code customers must enter (either a general one or a unique code). Go to Marketing > Cart Price Rules and click Add New Rule. Enter the same information as required above on the Rule Information tab. You can also specify how many times a code can be used.
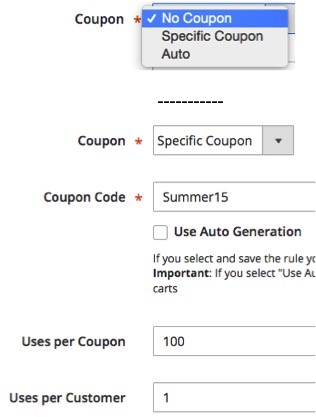
If you click Coupon the dropdown options are:
- No Coupon – Discount will auto apply
- Specific Coupon – You can customise the coupon required (allows you to auto-generate multiple random codes)
- Auto – Magento will automatically generate coupon codes on the fly, which is particularly useful if you’re using it with an abandoned basket reminder.
Here we have chosen a specific voucher code and chosen to limit it to only 100 orders and only 1 order per customer.
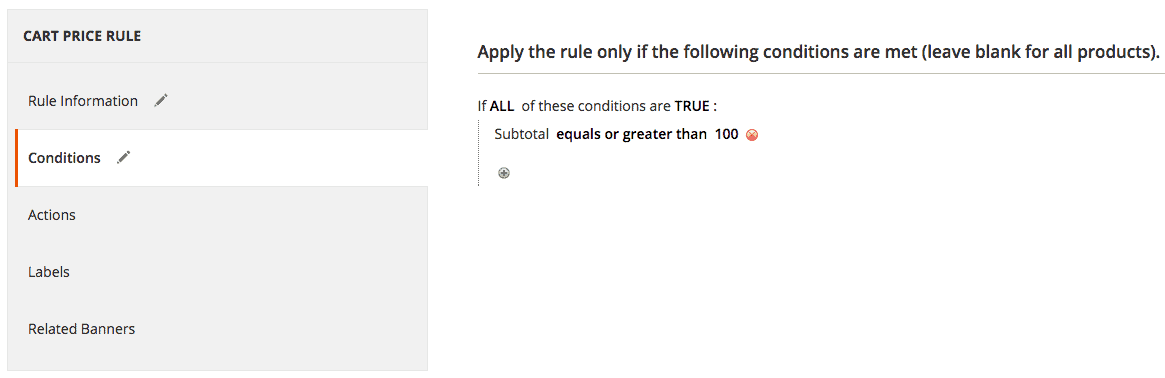
Next you will need to apply the Conditions. For this example we are offering £15 discount on orders of £100 or more, so we need to make the conditions trigger when a customer has £100+ of goods in their basket.
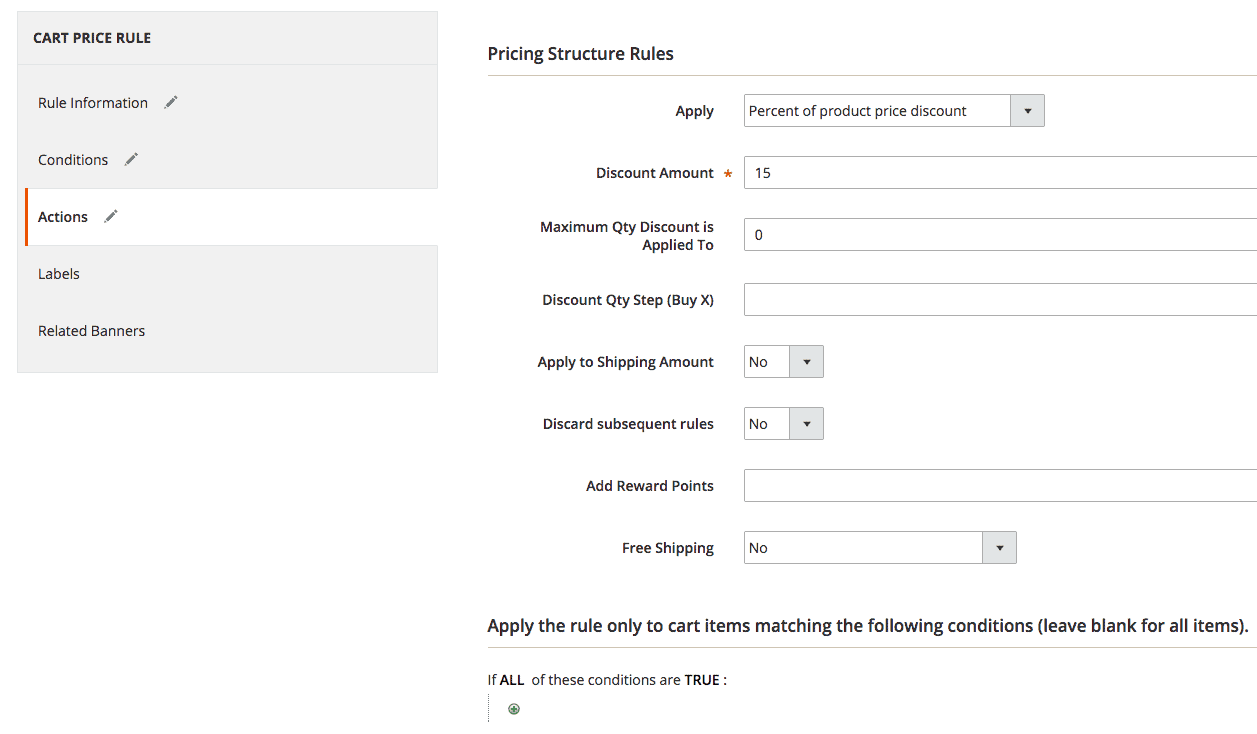
Now we need to set the Actions.
Select Fixed amount discount and enter 15 in the Discount Amount. If you want to limit the amount of discount, you can do this in the next step – most useful when you are offering a percentage discount. Complete the rest of the steps and then review the rules at the bottom of this tab. If you want to restrict the products the discount can be applied to, you can do that here. For example, to protect the margin of certain products.
This is all the essential information required so once complete hit Save and you’ve now set-up 2 new promotions.
5. Order processing
When you’ve made your first sale, you need to process the order and get the product shipped to your customer. To view a list of all orders you have received go to Sales > Orders.
You’ll see a list of orders that have been made through your site, and in this guide we’ll show you how to process an order and do a refund.
First of all click on View in the Action column as seen in the screenshot below.

Depending on your payment integrations, the payment may have been taken already and if so, the Status of the purchase will be in Processing and an invoice will already have been created. If you’re using a payment method, such as Check/Money order as shown in this example, the invoice has not been created and the status of the order is pending.
To create the invoice simply click the Invoice link at the top of the order view

Scroll to the bottom if you wish to part invoice the order. You can do this by altering the quantity in the Items to invoice section as per the screenshot below.
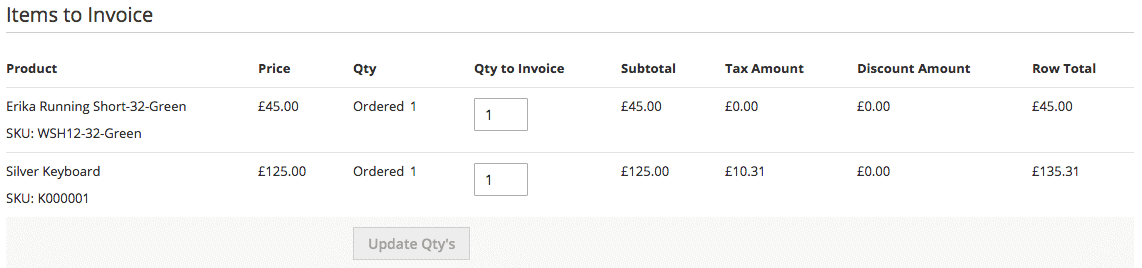
In this example, we will keep things simple and invoice the whole order, and you can do this by clicking the Submit Invoice button in the bottom right corner of the invoice.
The order is now ‘paid’ and is ready to ship. Simply click the Ship link at the top of the order view.
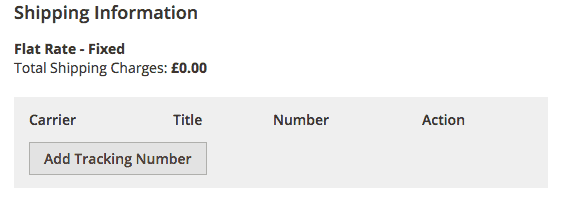
When creating a new shipment you can add a tracking number if required by simply clicking the Add Tracking Number and adding the details. These details will be emailed to your customer in the delivery notification.
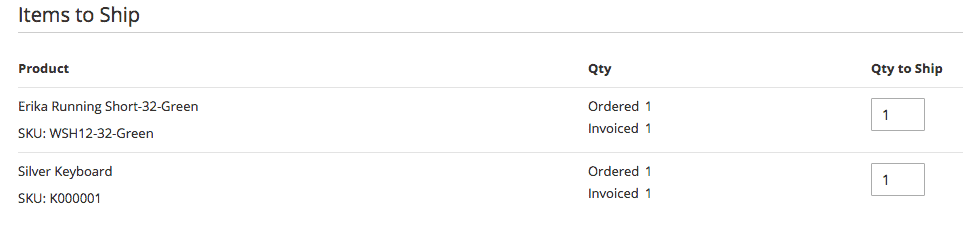
You can also choose only to part ship an order by adjusting the quantity against each item in the shipment.
6. Customer information
Your customers are the most important thing about your online store so it’s imperative you know who they are, how they spend, and what they are worth to you.
Magento 2 gives you plenty of details about each customer so here is a run through of some key parts.
If you go to Customer > All Customers you will see the table below, which shows some general information about all your customers.
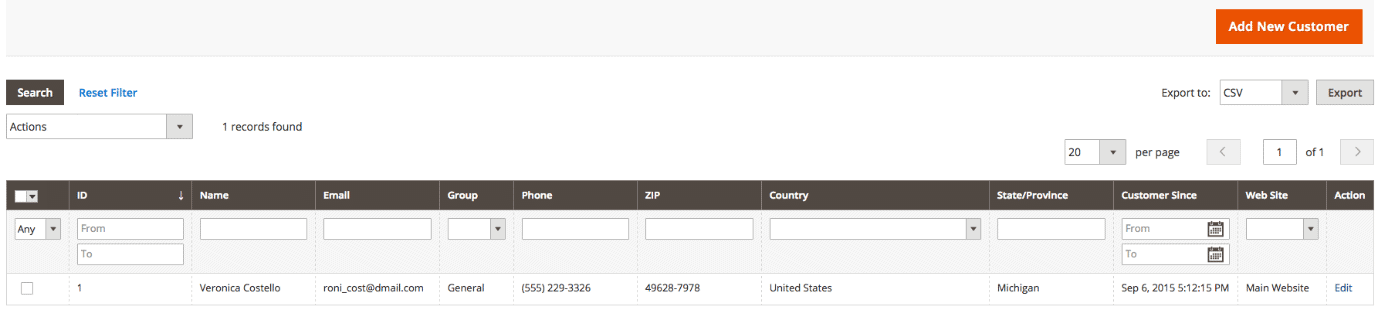
Here you can search for a specific user and can amend any details, such as a change of name on an account. Use the search fields just below the title of each column. Once you have found the person you are after you can click on them and view their information in more detail. Key tabs include:
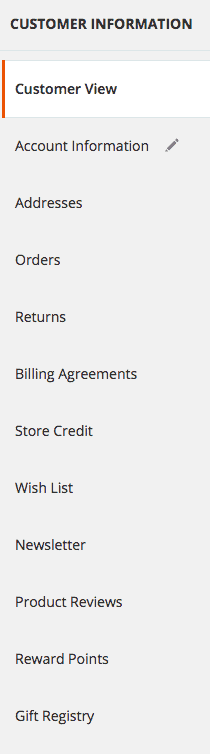
- Account Information – allows you to edit the customer group, name and email address
- Addresses – where you can update the shipping and billing address, or add new addresses on the customer’s request
- Orders – shows you all previous orders in detail including date, items, and value.
- Product Reviews – if enabled on your site you can see what kind of reviews each person is leaving. All of these tabs contain very useful information to help paint a picture of who your customers are.
Get in Touch
If you’re looking for ways to boost your e-commerce store, Bing Digital can help. We are an eCommerce Consultancy Firm and Magento Services Company, we’re committed to providing effective e-commerce solutions to businesses across the UK. If you’d like to discuss your requirements further, get in touch today.
Give our team a call on 01634-540-160, or complete our online enquiry form and we’ll be in touch soon.
7. Adding Reviews and Ratings
Product reviews are a nice way for customers who are satisfied with your store’s products and service to show their satisfaction. You will also be able to feature these reviews on your website, for your other visitors to see. Ratings on the other hand consist of criteria that can be modified to better represent your store’s features.
To manage your product’s reviews and ratings:
STEP 1 – Add a new Rating Criteria
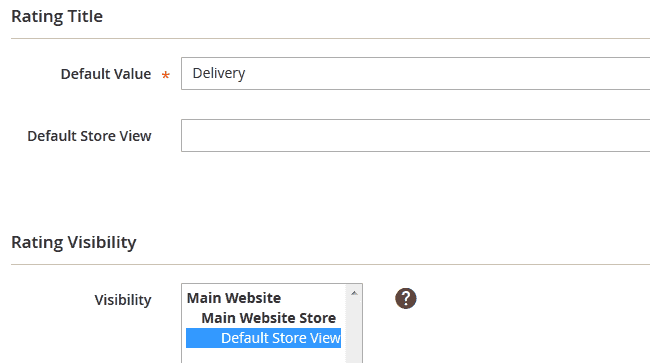
Let us add a new Rating Criteria for our store called Delivery. With it the customers will be able to rate the delivery service that we offer when submitting a review.
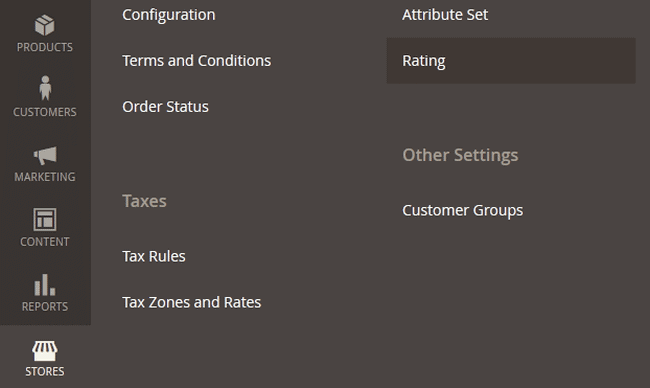
Login to your store’s admin dashboard and navigate to Stores>Rating from the main admin panel.
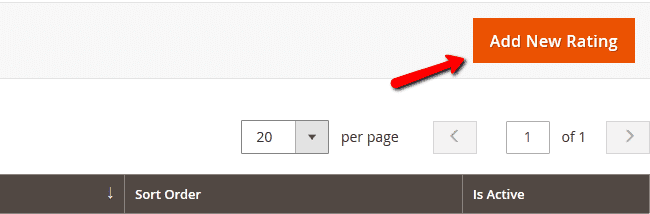
Click on the Add New Rating button.
We will name the Default Value – Delivery and set the visibility to Default Store View. We will also checkmark the new rating as Active and set the Sort Order to 3 as we have some existing Rating Values
8. Yellow Box
If the predefined criteria seem active but are not showing in the review submission process, you will need to set their visibility to Default Store View and click Save Rating to save and apply the setting).
When you are ready, click on the Save Rating button to add the new Value.
STEP 2: Add a new Review
To add a new Product Review, you will need to navigate to the Marketing>Reviews section of your admin panel.
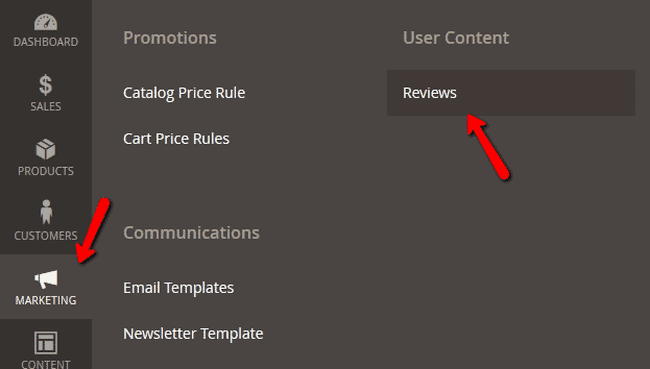
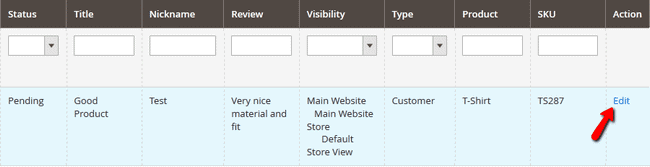
Here you can manually add a new Review (if you have received such via some other communication method like email or on your store’s Facebook page) or select from the user submitted reviews and make them visible on your website. To do the second, select a review and click its edit button.
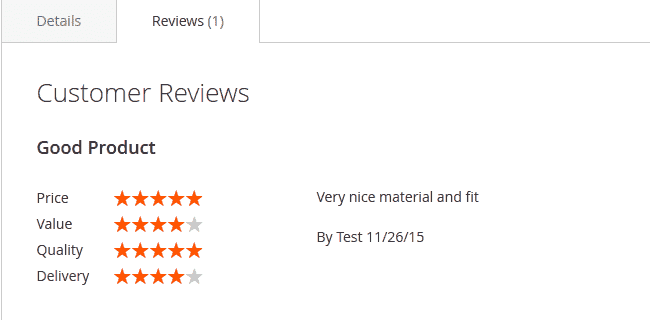
Here you will see the review details that include the Product which is being reviewd, the author of the review with its account and email, the Ratings and Status which you can change to approved in order to add the review.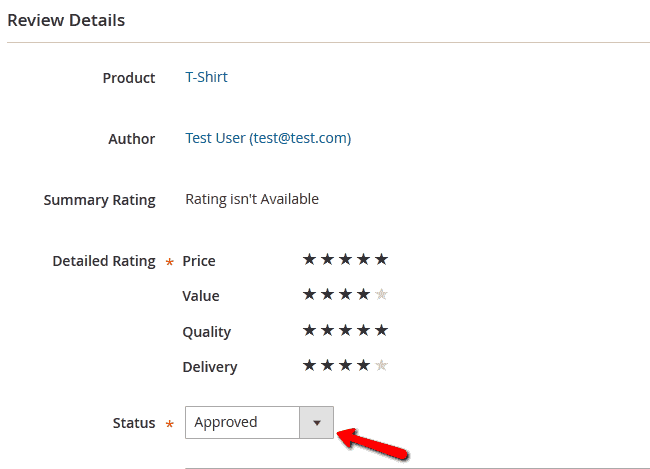
Below the status drop-down menu you will also see the Nickname of the author, the summary of review and the review itself.
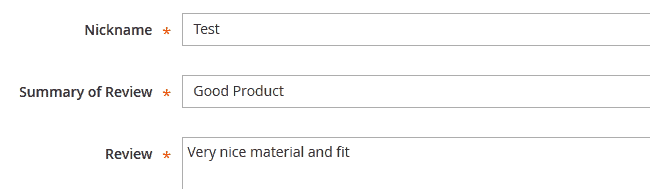
You can edit all of those fields and you should do so to remove any grammatical or spelling mistakes so the review looks better on your website’s front-end.
Click the Save Review button to add the review. This will make it visible on the front-end in the Reviews tab below the product.
9. How to Configure Product Custom Options in Magento 2
Configuring Product Custom Options is the simple way to give your customers many choices for a detailed products. The input types of an option you can set are text, file, select and date. However, you can manage the custom options in stock because they are just variations of an SKU. If you want to set one option for a bulk of products in magento 2 extensions, let do it for one, and then import the custom option to other items.
Adding more product custom options means you will generate the greater revenue and serve your customers in the perfect way.
10. Overview of configuring product custom options
How to Configure Product Custom Options in Magento 2 as the following:
- Creating custom options
- Importing custom options
11. Creating custom options
- Click on the Edit link of specific product on the Product Management table.
- On the left-panel, Advanced Settings > Custom Options.
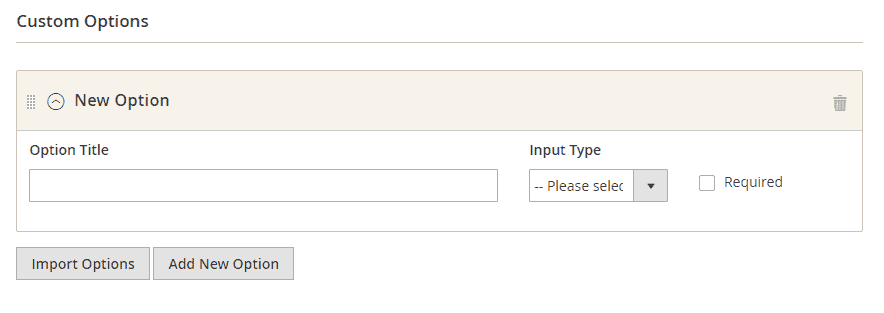
- Click on the Add New Option,
- Name for the Option Title
- Select the Input Type from a dropdown list.
- Mark the Required checkbox if you find the option necessary.
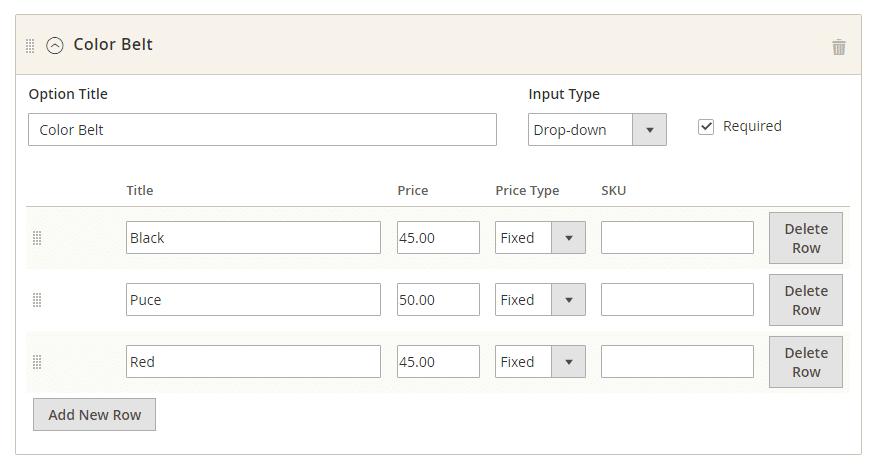
Complete all of the above, do the next:
- Insert the Price for the option
- Choose the Price Type: Fixed or Percentage.
- Name the SKU for the option.
- Allow rearranging any option as you need, hit the Sort icon to drag it to the new place.
- Continue to click on the Add New Option if you want to add more.
- Click on the Save button to finish.
12. Importing custom options
- Click on the Import Options.
- Search and select the option you want to import.
- Click on the Import button.
- Click on the Save & Close button when you finish.

Next Article: Installing Extension Form Magento 2 Using Web Setup Wizard